In a newly created document, the coordinate system in Scriptographer has its origin in the upper left corner of the page and extends to right and downwards from there.
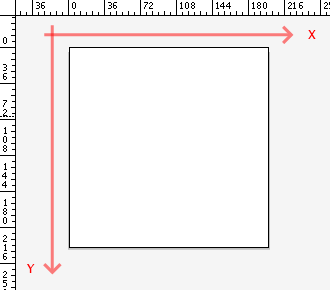
Depending on how you set up your rulers, the origin may differ, but by default the orientation of the coordinate system will be the same.
Rulers and Units
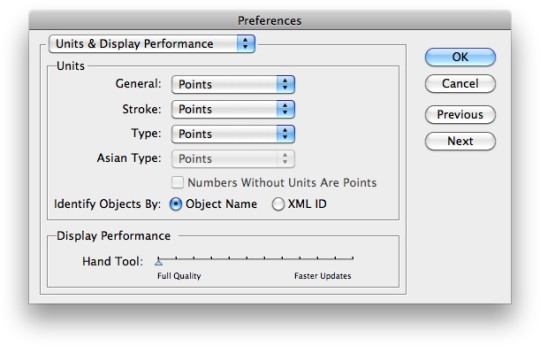
To see where the origin is located, display the rulers in the Illustrator document by selecting View → Rulers → Show Rulers or by pressing Cmd-R. No matter what units you have set the Illustrator preferences to, the rulers always display the coordinate values in Point units (pt). This is also the unit that Scriptographer internally works with, so you might want to switch all preferences to that when working with Scripts. Open the Preferences window, go to the Units Preferences and switch all units to Points:
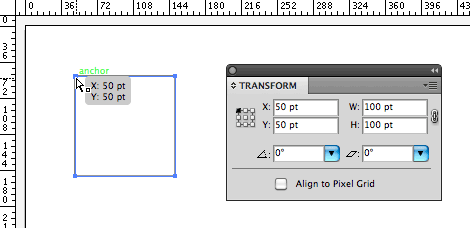
Below is a simple example of the relation between units in code and in the Illustrator UI. Executing the following script produces a rectangular path with the top left corner at {x: 50, y: 50} and with a size of {width: 100, height: 100}. Read the Working with Path Items tutorial for more information about creating path items.
var topLeft = new Point(50, 50);
var rectSize = new Size(100, 150);
var myRect = new Path.Rectangle(topLeft, rectSize);
The resulting rectangle can now be examined in multiple ways in Illustrator. Hovering over points will display their coordinates. The Transform palette will display the width and height of the object, and the coordinates of a reference point, which when set to top left corner will be the same as the values used in the script.
Previous Versions of Illustrator and older Scripts
If you work on Illustrator CS4 or below, you will find that the user interface displays values with the opposite orientation in the Transform palette. There, Y-coordinates start with 0 at the bottom of the page and extend upwards from there. As of CS5, Adobe has decided to switch the coordinate system to be top-down instead, in order to follow the convention in most other design applications. It made sense for Scriptographer to do the same, and we believe w came up with a good way to still remain backward compatible and not break old scripts:
Scripts can be set into the backward compatible bottom-up orientation by adding this line of code to the beginning of your script:
script.coordinateSystem = 'bottom-up';
We have added this switch to all the scripts uploaded to this website. so if you find a script that you previously downloaded from here does not work on the new version anymore, just download it again.